# TikTok (Pixel & Events API)
When enabled, Zellify automatically fires TikTok events as users move through your funnels.
This allows you to:
* Optimize ad delivery using funnel and payment signals
* Track conversions across the full funnel journey
* Improve event match quality with server-side Events API tracking
* Build custom audiences based on funnel behavior
* Attribute purchases back to specific TikTok ad campaigns
Both the Pixel and Events API send the same events with the same event ID, allowing TikTok to automatically deduplicate them.
***
## Enabling the Integration
TikTok is configured per campaign.
To enable TikTok on a campaign:
1. Open a **Campaign** in the Zellify dashboard
2. Go to **Campaign Settings**
3. Select **TikTok** as the traffic source
4. Enter your **TikTok Pixel ID**
5. (Optional) Enter your **Events API Access Token** for server-side tracking
6. (Optional) Enter a **Test Event Code** for debugging
When enabled:
* The TikTok Pixel is loaded on all funnel pages in that campaign
* If an Events API token is provided, server-side events are sent in parallel
This allows you to use different Pixels for different campaigns.
***
## Finding Your Pixel ID and Access Token
### Pixel ID
1. Go to **TikTok Events Manager**
2. Select your Pixel under **Web Events**
3. Your Pixel ID is displayed in the header
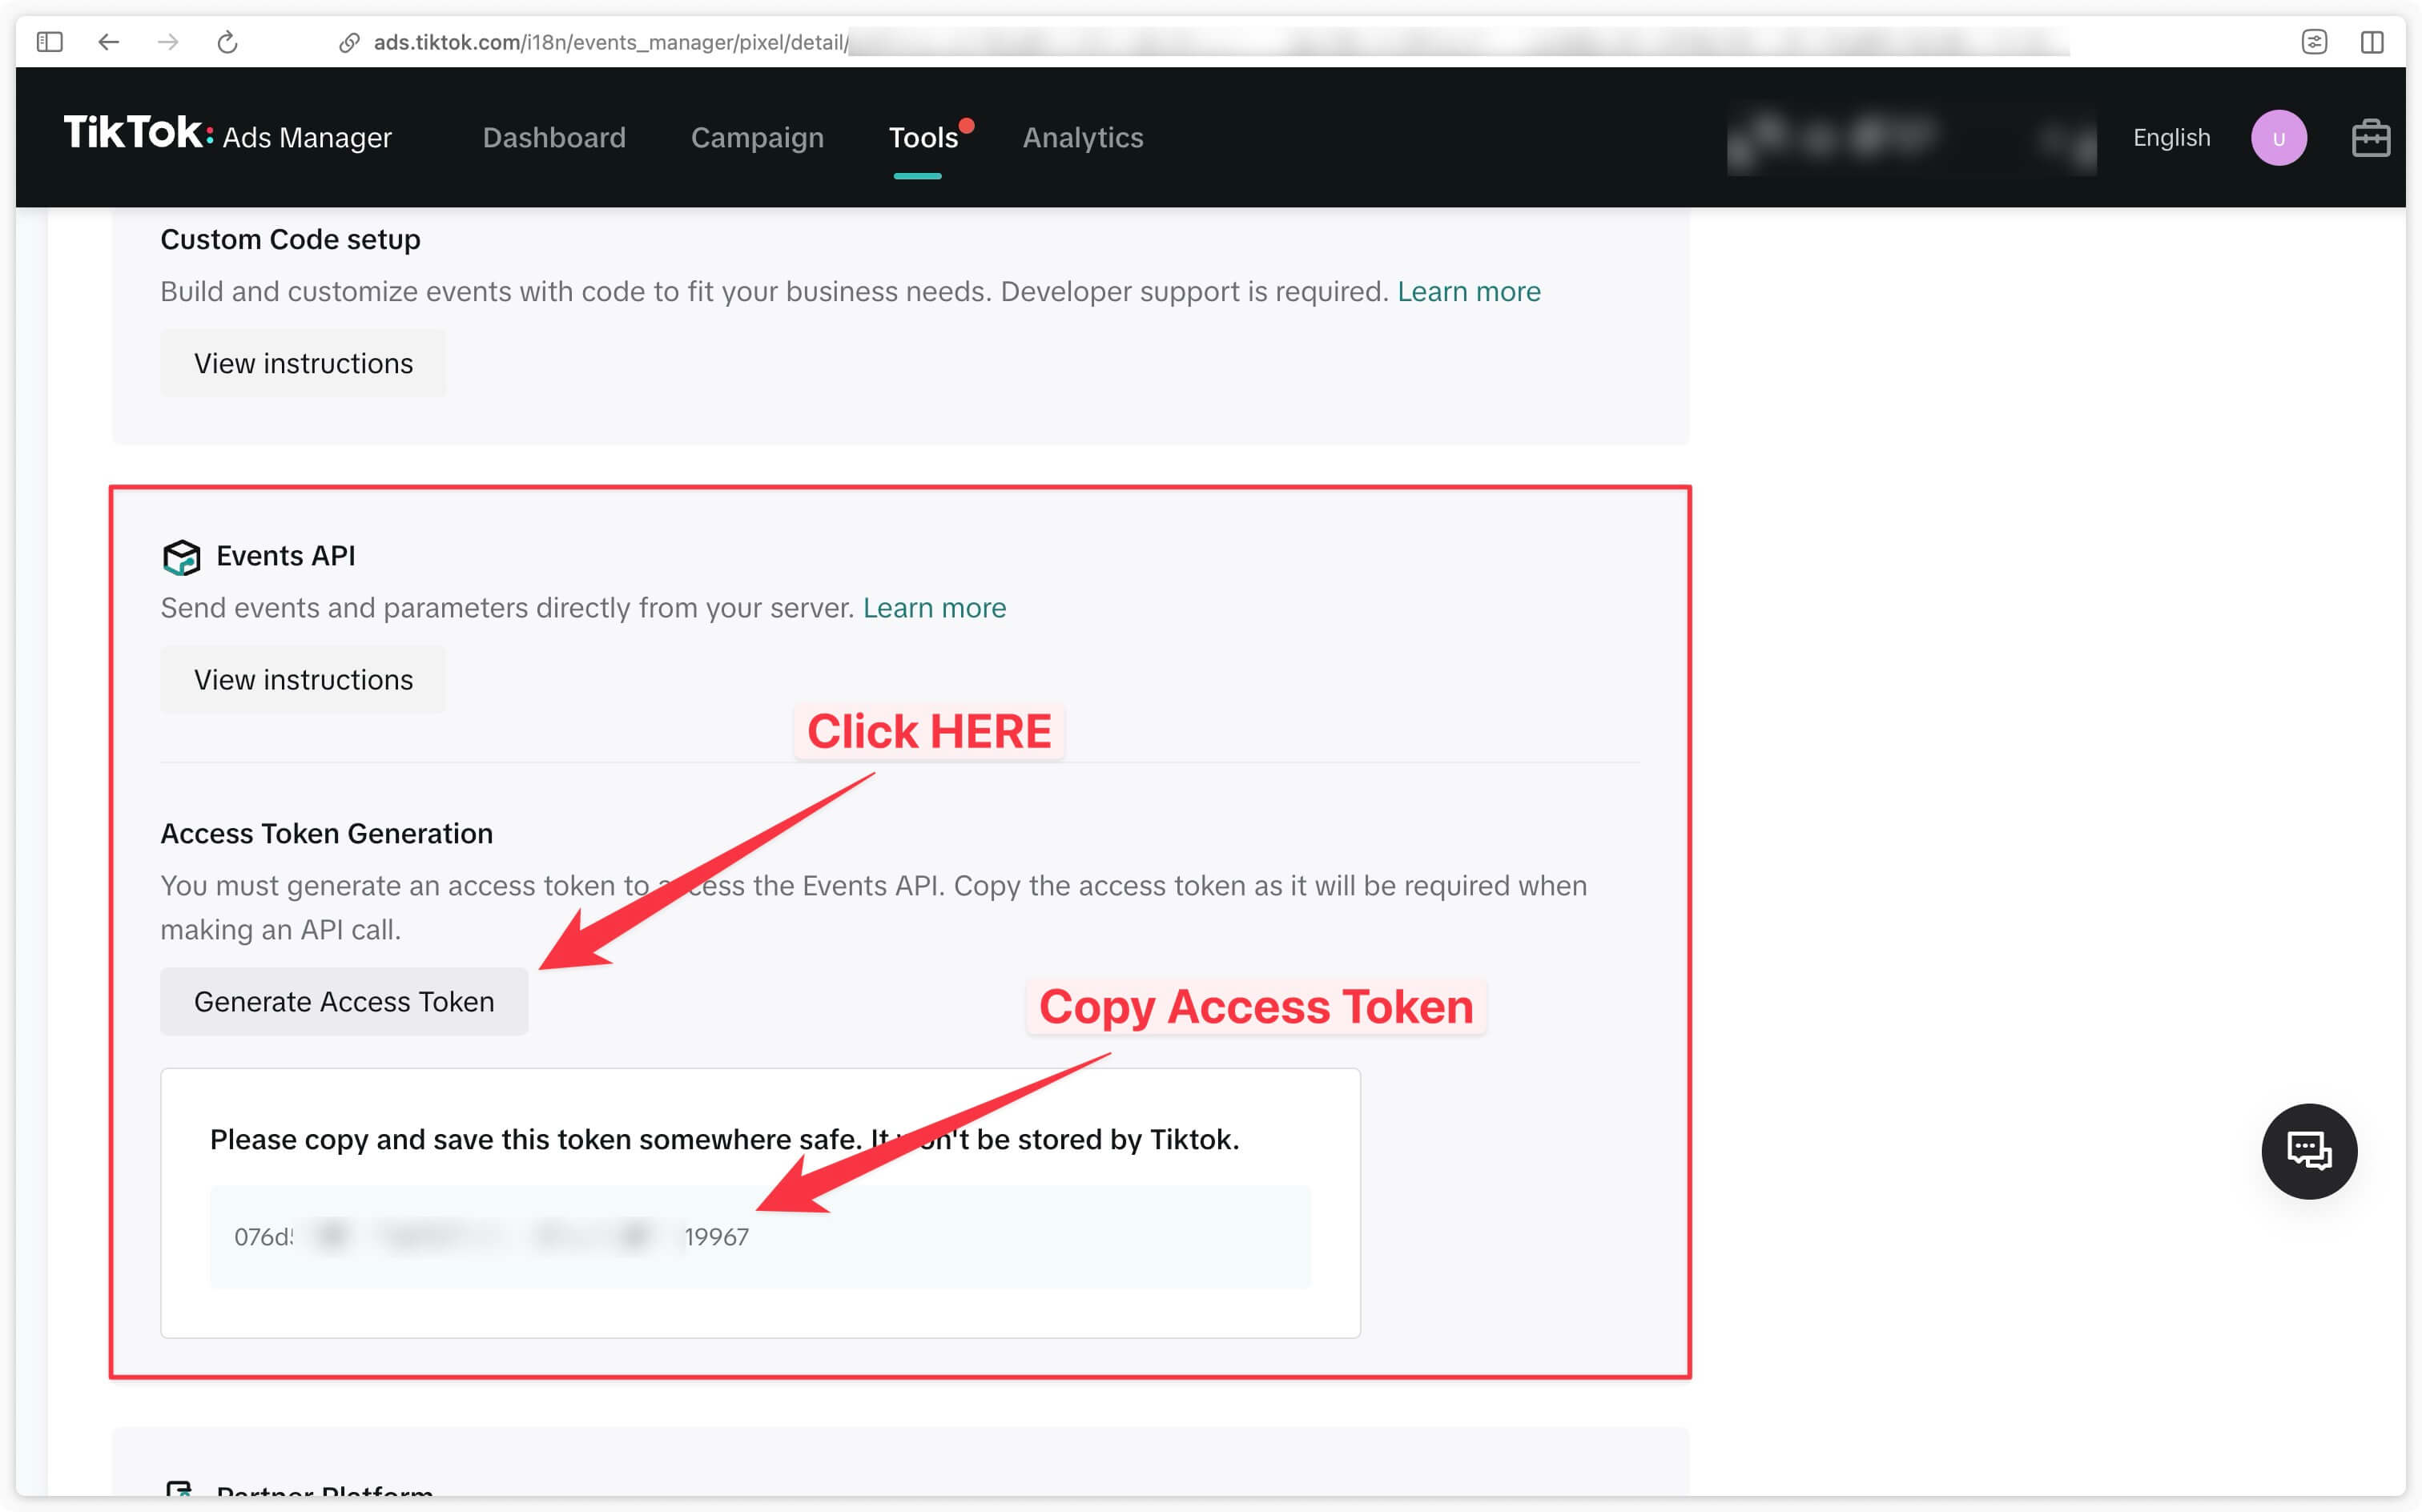
### Events API Access Token
1. In TikTok Events Manager, select your Pixel
2. Go to **Settings**
3. Generate an access token under **Events API**
4. Copy the token and paste it into Zellify
### Test Event Code (Optional)
1. In TikTok Events Manager, go to **Test Events**
2. Copy the Test Event Code
3. Paste it into Zellify to verify events are received correctly
***
## How It Works
Every event can be sent through two channels:
**Pixel (client-side)**\
Events are fired directly from the user’s browser.
**Events API (server-side)**\
The same events are sent from Zellify’s backend to TikTok.
Both channels send the same `event_id`. TikTok uses this ID to deduplicate events, ensuring each conversion is counted only once while improving match quality.
Server-side tracking requires an Events API Access Token.\
If only a Pixel ID is provided, only client-side tracking is active.
***
## Events Sent to TikTok
Below is the full list of events sent to TikTok.
| Funnel Event | TikTok Event Name | Type | Includes Value |
| -------------------- | -------------------- | -------- | -------------- |
| Page view | PageView | Standard | No |
| Lead | Lead | Custom | No |
| Page completed | PageCompleted | Custom | No |
| Email captured | CompleteRegistration | Standard | No |
| Checkout presented | InitiateCheckout | Standard | Yes |
| Payment method added | AddPaymentInfo | Standard | Yes |
| Payment succeeded | CompletePayment | Standard | Yes |
| Payment failed | PaymentFailed | Custom | Yes |
| Trial started | StartTrial | Standard | No (value: 0) |
| Subscription started | Subscribe | Standard | No (value: 0) |
***
## Event Details
These events fire automatically as a visitor moves through your funnel.
TikTok receives the same event stream from:
* **Pixel (browser)** — always, when a Pixel ID is set
* **Events API (server-side)** — only when an Access Token is set
### Funnel navigation
#### PageView
Fired on every funnel page visit.
Use it to measure traffic volume and build basic view-based audiences.
#### PageCompleted (Custom Event)
Fired when a visitor completes a funnel step.
Use it to analyze step-to-step progression and drop-offs.
### Lead capture
#### Lead (Custom Event)
Fired when the visitor progresses beyond the first step.
Use it as an early intent signal for optimization and audience building.
#### CompleteRegistration
Fired when the visitor submits their email.
Use it to optimize for email capture and build identified audiences.
### Checkout & payment
#### InitiateCheckout
Fired when the payment form is loaded.
Includes value data.
#### AddPaymentInfo
Fired when the visitor begins entering payment details.
Includes value data.
#### CompletePayment
Fired when a payment completes successfully.
Includes full purchase value and item details.
See **CompletePayment Event Data** below for the exact fields.
#### PaymentFailed (Custom Event)
Fired when a payment attempt fails.
Includes value data.
### Subscription lifecycle
#### StartTrial
Fired when a free trial begins.
Value is set to 0.
#### Subscribe
Fired when a paid subscription begins.
Revenue is reported through the **CompletePayment** event.
***
## CompletePayment Event Data
When **CompletePayment** fires, the event includes:
* value — Total purchase amount (decimal, e.g. 9.99)
* currency — Currency code (e.g. USD)
* contents — Array of items with content\_id, content\_name, quantity, and price
* content\_type — Always set to product
* num\_items — Number of items purchased
This ensures accurate revenue tracking and optimization inside TikTok Ads Manager.
***
## User Identification & Matching
Zellify sends user data with every event to improve TikTok’s ability to match events to user profiles.
### Client-Side Identification
* On the first event of a session, the user is identified with their session ID (external\_id)
* When email is captured, the user is identified with their email and session ID
### Server-Side User Data (Events API)
The following fields are sent server-side:
* external\_id — Session ID (SHA-256 hashed)
* email — User’s email (SHA-256 hashed after capture)
* ttp — TikTok browser cookie
* ttclid — TikTok click ID (from ad URL)
* ip — User’s IP address
* user\_agent — Browser user agent
The ttp cookie is automatically set by TikTok’s Pixel.\
The ttclid is captured from the URL when a user clicks a TikTok ad.
Both are forwarded server-side to improve event match rates.
***
## Event Deduplication
Both the Pixel and Events API send the same event\_id for each event.
TikTok uses this ID to deduplicate events, ensuring each conversion is counted only once even though it arrives through two channels.
This is handled automatically by Zellify and requires no additional configuration.